MFA Setup
Once you have been enrolled in MFA (Multi-Factor Authentication), you can set up your authentication method by going to the following website: https://myaccount.microsoft.com/
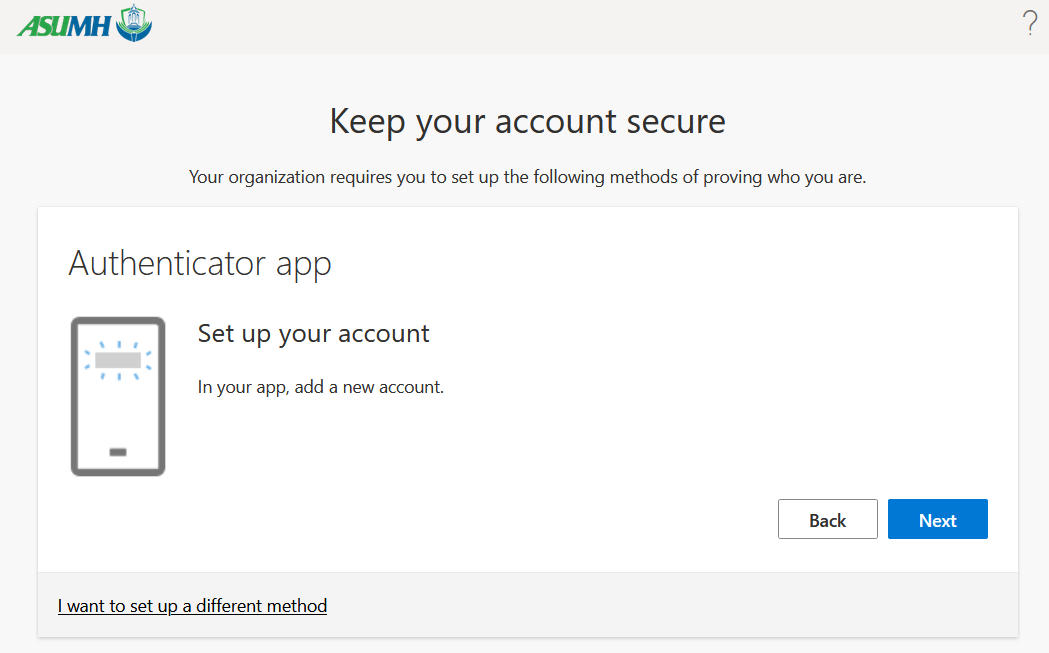
After logging in, you will see the following message:
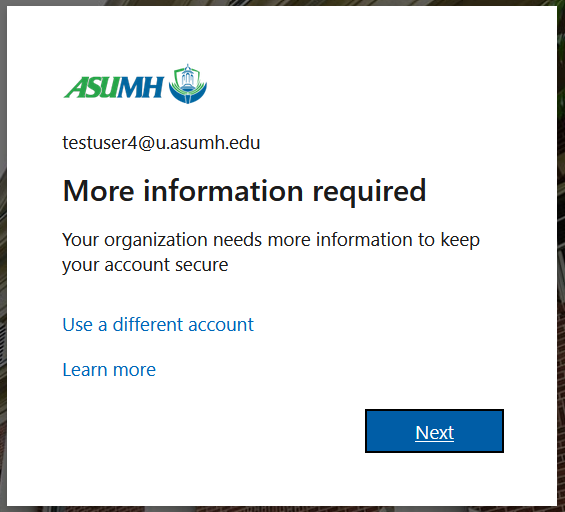
Click Next to get the following choices:

The best option here is to use the Microsoft Authenticator app. If you don’t have it already installed on
your phone, go ahead and download it from app store, then click Next. If you don’t want to use that
app, see the Optional Instructions at the end of this document.
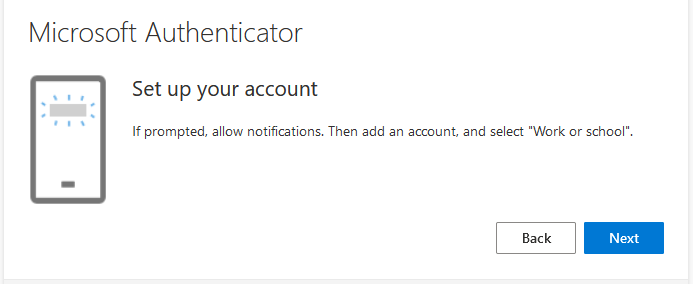
Click Next.

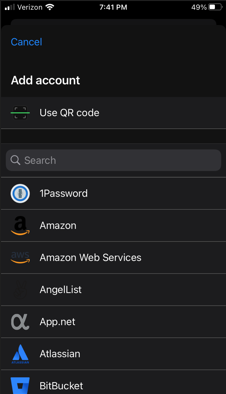
In the authenticator app on your phone, add a new account, use Work or School account, then scan the
QR code. If all goes well, it should add an account to your app. If it fails (usually from taking too long to
get the app open to the point of scanning the code), simply click the Back button and then try again with
a new QR code.
Once you have successfully added the account to the authenticator app on your phone, click Next to test
it out:
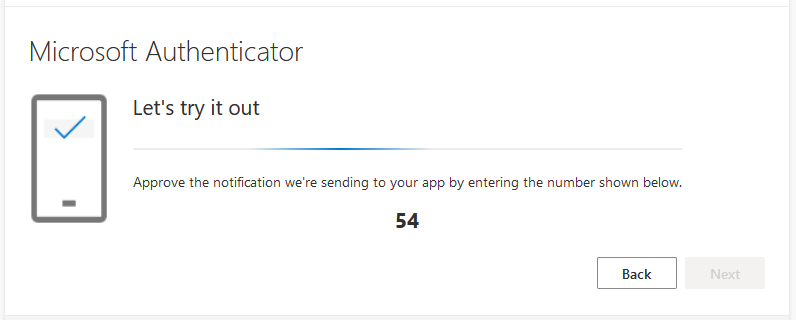
Enter the 2-digit code that you get into the app on your phone. If it works correctly, you should get the
following success message:

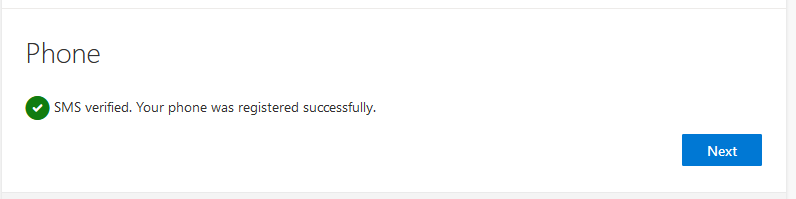
At this point, you will need to set up the 2 nd authentication method. This will be needed in case you
forget your password and need to reset it. The easiest thing to do here is to use your phone to get a text
message.

Enter your phone number and click Next.

Enter the 6 digit code that you got on your phone and click Next.
If all goes well, you should get the following:
After clicking Next and Done, you might see a login screen one more time. After that, you’ll end up at
the following page:

This is actually a handy little page to check on your account status and reset your password and/or
change authentication methods (like when you get a new phone number). You can also check the My
sign-ins page to see if your account has been logged into from other locations (if you do see any
suspicious activity here, please notify us immediately so that we can investigate it further).
Congratulations! You are all set up with MFA. You’ll use one of those methods above for most
everything like Gmail, VPN, Zoom, Adobe, etc. (pretty much everything except Banner and Blackboard).
Optional Instructions
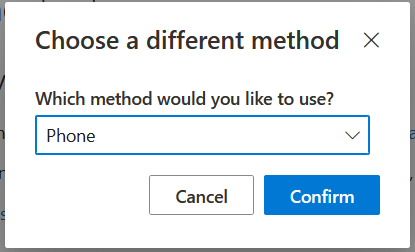
If you want to use a different app, such as DUO, then pick the option to use a different authenticator
app. The downside is that these apps don’t support Push Notifications (the alert you get on your phone
when you attempt logging in to a site).
Click Next to get a QR Code. On your phone, in the DUO app, select Add account, and select the option
to Use QR code:
Options if not using authenticator app
If you do not want to use an authenticator app, then you can use text messaging to your phone and
email messages. In this case, your phone number must be the primary authentication method. You
cannot setup email until you finish the phone part.
If you select the option to set up a different method, you can use your phone for SMS text messages:
You can enter your phone number just like above and verify it with the text message that you receive.
After completing that authentication method, you can select the option to set up a different method
again, and this time you will see an Email option:

After you enter your personal email address (not your asumh.edu address), and confirm the code that
you receive, you will be successfully enrolled in MFA.
For more detailed information, check out the following Microsoft article:
https://support.microsoft.com/en-us/account-billing/set-up-the-microsoft-authenticator-app-as-your-
verification-method-33452159-6af9-438f-8f82-63ce94cf3d29